Sending Messages
The process of sending mail to your database
is quite simple:
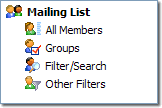
1. Select who to send the message
to
|
|
By default,
MailList King will send the messages to all recipients in your current
view mode. I.e., if you have filtered
your list or selected some groups, then the displayed list will be
the recipients of your message. Otherwise the created message will
be sent to all members of your mailing list.
Note: You can also manually
specify recipients or load them from a file. Select
these options from the Message
Recipients Dialog by clicking the "To" button in the send
dialog |
2. Select "Home" >
New Email on the main toolbar |

|
3. Compose your message
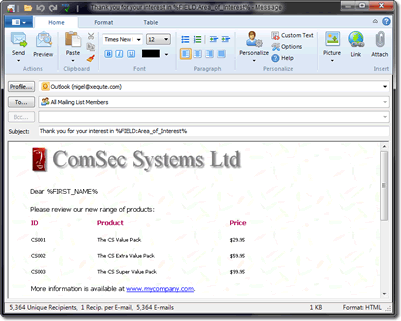
Enter the
following details for your message:
- Message
Body: You can either type a message,
paste a message from the clipboard or load it from a text or HTML file
on your disk. You can also personalize
your message with the name and other details of the recipient.
- Message Format: Under "Format" you can specify whether
your message is in plain text or HTML
(Rich Text) format.
- Attachments
(optional): Add any files that you want sent with the message
- Profile
(optional): Your message will be sent using the method and reply address
of your default sending profile. If
you have enabled the "Show
Profile Box" you can optionally select an alternative sending
profile (to change the delivery method or reply address)
4. Click Send
When 'Send
Message' is clicked MailList King will generate a unique list of recipient
to ensure that the message is only sent once to each recipient.
If you click
the small down arrow to the right of the "Send Message" button
you will be given three sending options:
- Send
Message: Sends the message to the specified recipients immediately
- Send
Test Message: Sends a single text message using your current sending
method so that you can see how your message will appear to recipients
Message
Sending Toolbar
Home Tab
|
|
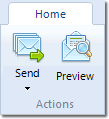
Send Message |
Send
the current message. Click the small down arrow right to the right
to see extra sending options |
|
Preview Message |
Display the message as it will appear to recipients (i.e. functional
links and normalized personalization
fields) |
|
|
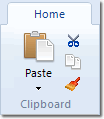
Paste |
Paste text from the clipboard |
|
Cut |
Cut
the selected text |
|
Copy |
Copy
the selected text |
|
Format Painter |
Copy the formatting of the selection
to another location |
|
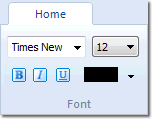
|
Font |
Set
the style of the selected text |
|
Font Size |
Set
the size of the selected text |
|
Bold |
Set
the selected text as bold |
|
Italicize |
Set
the selected text as Italicized |
|
Underline |
Underline
the selected text |
|
Font Color |
Set the color of the selected text |
|
|
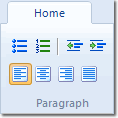
Add Bullets |
Add
bullets to the selected text |
|
Add Numbering |
Add
numbering to the selected text |
|
Unindent |
Move the selected text
further left |
|
Indent |
Move the selected text
further right |
|
Align Left |
Align
the selected text to the left side of the page |
|
Center |
Align
the selected text to the center of the page |
|
Align Right |
Align
the selected text to the right side of the page |
|
Justify |
Align
the left and right sides of the text |
|
|
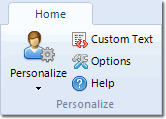
Personalize |
Insert
a personalization field
into your message, such as first name, e-mail, custom field, etc |
|
Custom Text |
Insert text which is conditional depending on a field of the member,
e.g. customizing greetings for each country |
|
Options |
Configure settings related
to use of personalization fields |
|
Help |
Display the personalization
help page |
|
|
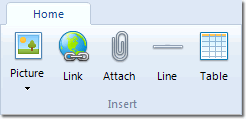
Picture |
Embed
an image into your message (either loaded from a file or linked to a web
based image) |
|
Link |
Add
a web or mail link to your message |
|
Attach
File |
Add
a file to your message |
|
Line |
Insert a horizontal
line |
|
Table |
Insert an HTML table
to control the layout of the message |
Format Tab
|
|
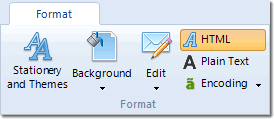
Stationery and Themes |
Load HTML stationery to improve
the styling of your message, or load an HTML template for standard layout |
|
Background |
Specify a color or image to use as your background |
|
Edit |
Edit the message in an external editor or directly edit the HTML source |
|
HTML |
Enable rich
text formatting of your message |
|
Plain Text |
Specify unformatted message format |
|
Encoding |
Specify the encoding for the message
for international languages |
|
|
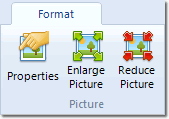
Properties |
Configure the alignment
and other properties of the selected image |
|
Enlarge Picture |
Display the image at
a larger size |
|
Reduce Picture |
Display the image at a smaller size |
|
|
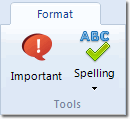
Important |
Specify the priority of the message to
high |
|
Spelling |
Check
for spelling mistakes in your message |
Picture
Tab
|
|
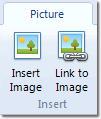
Insert Image |
Embed an image into your message (that is sent with your message) |
|
Link to Image |
Inserts an image that is based on a web site (so is not sent with
the message but loads when user views the message) |
|
|
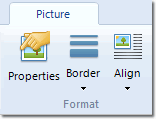
Properties |
Modify properties of the image |
|
Borders |
Add a border to the image |
|
Align |
Change the way the image aligns with the text |
|
|
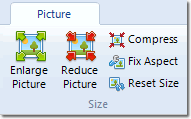
Enlarge Picture |
Display image at larger size |
|
Reduce Picture |
Display image at smaller size |
|
Compress |
Resize the images in your message to their displayed size (so your message
is sent more quickly). You can do this automatically at sending by enabling
the relevant setting in options |
|
Fix Aspect |
If you have resized the image incorrectly (looks stretched in one dimension),
this function will display it correctly |
|
Reset Size |
Return the image to its original size |
|
|
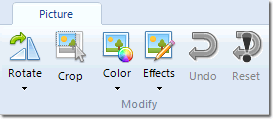
Rotate |
Rotate the image |
|
Crop |
Remove unwanted areas of an image |
|
Color |
Modify and enhance the image color |
|
Effects |
Perform image effects, such as adding a soft shadow |
|
Undo |
Undo the last change to the image |
|
Reset |
Undo all changes to the selected image |
Table Tab
|
|
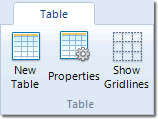
New Table |
Insert an HTML table
to control the layout of the message |
|
Properties |
Configure borders and
other settings of the selected table |
|
Show Gridlines |
Enables you to view the transparent borders of your tables while
editing |
|
|
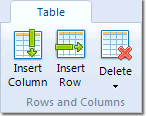
Insert Column |
Add another column at
the current position |
|
Insert Row |
Add another row at the
current position |
|
Delete |
Remove the selected column or row |
|
|
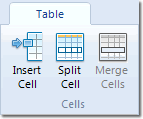
Insert Cell |
Add a cell in the current
row |
|
Split Cell |
Undo the merging of
multiple cells |
|
Merge Cells |
Join multiple cells into one combined cell |
There are also keyboard shortcuts available for most editing
functions
See Also


