
 |
Editing your Slideshow |
The New Project Wizard allows you to quickly
create a new slideshow and burn it to disc. For more control over
the slideshow you can edit it in the main window.
These are the steps for creating a slideshow from the main window:
1. Select your images and videos
|
|
Click the "Add Images"
button to select images and videos for your slideshow.
(You can also drag images from Windows and drop them into PixPlay) |
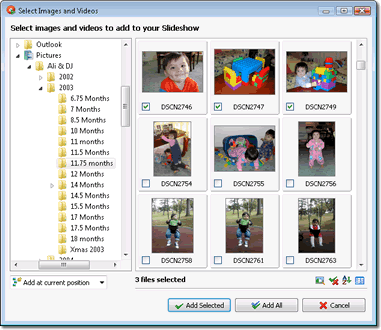
Select a folder that contains images or videos from the left panel of the thumbnail browser Then click the checkbox for each image you wish to add. When you are ready click "Add Selected" to insert them. If you click the "Add All" button then all the images and videos in the displayed folder will be added.
Tip: To select a range of images, click the first one, then while holding down the Shift key click the last one. Then click the Space bar to toggle the check box for all selected images.
Almost all image formats are supported. Video files will need to be of a compatible format, such as MPEG or standard AVI (see our support page if you have difficulties).
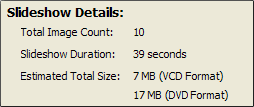
| The number of images in your slideshow is displayed in the right
panel (Frame Count) as well as the duration of the slideshow and the estimated
size. Depending on the type of disk you are creating you
will need to keep the total size under 650 MB (CD) or 4.4 GB (DVD).
Both VCD and DVD formats are shown (you can choose the format when you
burn your disk).
Generally you will be able to create a slideshow of about an hour on a VCD and 2-3 hours on a DVD. |
 |
2. Arrange your images and videos
The images in your slideshow are displayed in the main window, where the top-left image is the first frame of the slideshow and the bottom-right image is the last frame.
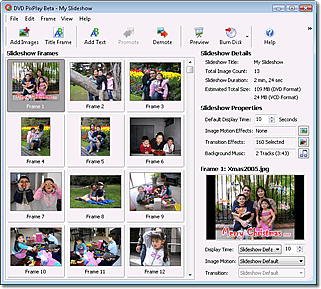
You can reorder the images using the Promote/Demote buttons or by dragging and dropping them to a new location.
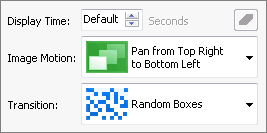
If you want a particular image to have a different display time or transition effect than the defaults for the album, then select the image(s) and change the values specified. You can also select Frame>Frame Properties to remove borders from the images and see previews of the motion and transition effects.
3. Add a Title Page?
|
|
To add a Title Page to your album, click the frame in your slideshow where the page is to be added then click the "Title Frame" button |
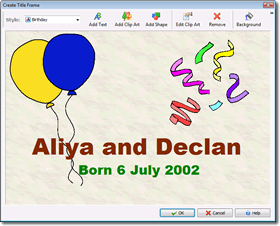
A text editing dialog is displayed. Read the Title Page section for more assistance.
4. Set your slideshow options
|
|
|
The main settings for your slideshow are displayed in the right panel. Others are specified by selecting Edit > Slideshow Properties |
Default Display Time:
Specify the number of seconds that each image in your slideshow is displayed for (except those for which you have set a custom display time).
Motion Effects:
Motion effects add interest to your slideshow by making your images appear as they are moving. Click the relevant button to select your preferred motion effects.
Image Transitions:
Transitions smooth the flipping of one image to the next using a variety of effects. Click the relevant button to select your preferred transition effects for the project.
Music:
Click the Browse button to select the music tracks to be played during the slideshow. View the Music section for more detail.
5. Preview your slideshow
|
|
Click the preview button to see a
simulation of the slideshow in action.
Note: For a more accurate preview, select File > Burn Slideshow Disk... and click the "Test" button. |
6. Burn your slideshow to disk
|
|
When you have arranged your slideshow
as desired, click the "Burn Disk" button to output the slideshow
to a CD or DVD View the Burning section for details. |
Also