![]() Ten Minute Tutorial
Ten Minute Tutorial
Smart Pix offers such a breadth of functionality that it can be quite daunting at first glance. The key to understanding Smart Pix is grasping how its media library works.
Lesson 1: The Smart Pix Media Library
Smart Pix uses a media library to store information about the files on your computer. The media library contains a list of the folders where you have files (you tell Smart Pix which folders to use), these are called your Source Folders.
E.g. it might look like this
C:\My Pictures\Porsche
C:\My Pictures\Porsche\Racing
C:\My Pictures\Ferrari
C:\My Pictures\Mercedes
When you give Smart Pix a new Source Folder, it will look at the folder and create a list of all the files it contains, e.g.
C:\My Pictures\Porsche
Boxster.jpg
pawshpic.gif
Fast_Porsche.jpg
911.png
C:\My Pictures\Porsche\Racing
racingpic.jpg
winning.gif
overtake.gif
C:\My Pictures\Ferrari
Red GTO.gif
etc.
So Smart Pix now has a list of files on your computer (all the files in the folders that you told Smart Pix were Source Folders). Note that Smart Pix isn't actually storing the files, it is just storing information on where the files are on your hard drive.
Now all of this would be pointless were it not for Keywords. Keywords are words or phrases you use to describe your file. Each file can have as many keywords as you like. For example for an image of a red Porsche 911, you might assign the keywords; 'Red', 'Porsche', 'German', Being Raced'.
So our media library might now look something like this (in actuality the media library isn't stored like this, as it uses relational tables to make it more efficient, but this is the easiest way to conceptualize it):
C:\My Pictures\Porsche\
Boxster.jpg
German
Porsche
Red
Boxster
US Release
pawshpic.gif
German
Porsche
959
Red light racing
silver
Fast_Porsche.jpg
German
Porsche
200 mph +
959
Rally release
etc..
These keywords can be searched upon once you have assigned them to your files. For example, to locate all your images of German racing cars, or all supermodels wearing bikini, or for whatever your image collection may be.
Assigning keywords need not be a chore either. If you already have your images organized into folders then Smart Pix lets you assign default keywords for each of your source folders, for example the folder, C:\My Pictures\Porsche, might have the default keywords: German and Porsche. Then whenever files from that folder are added to your media library, these keywords will be assigned to them.
There are also options to automatically generate keywords from folder or filename, and image and sound fields.
To add keywords for a file, you will need to display the keyword selector using View > Tool Windows > Keywords (or View > Keyword Selector if you are using the Simplified Interface Option).
So the key to the media library is:
If you are still having trouble getting your head around it, a good analogy is a school pupil list. The headmaster (= you) gives her assistant a list of all the classrooms (= Source Folder list). The assistant (=Smart Pix) goes to each classroom and makes a list of all the students in the class (= list of multimedia files). For each student you add a list of the subjects they take (= keywords). This is all punched into a computer so now the headmaster can see at a glance all students who take 'French, English AND Latin', or 'Physics OR Chemistry', etc.
You can see and add to your list Source Folders list by selecting Library > Add new source folder Wizard..

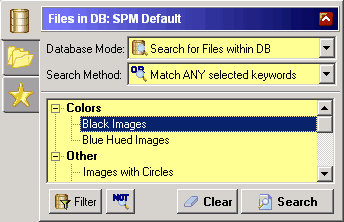
All the files in these folders can be viewed in Media Library mode. In media library mode you are offered a three methods of viewing your media library files:
What about Folders and Favorites modes?


Lesson 2: File Descriptions and Find
When you first click on a file and select File > File Info you will see a blank description box. This can be used for creating an in-depth description for particular files. These descriptions can be viewed at any time by selecting a file and hovering the mouse over the file name area in the status bar. You can also locate words within these descriptions by selecting Search in Media Library modes.
Lesson 3: Updating your Media Library
So, you've gone onto the 'net and downloaded 100 Pamela Anderson pics! Or you have deleted some old files to regain some disk space and didn't use Smart Pix! Oh no! Now, Smart Pix tells you it can't locate xyz.jpg and you can't access your new pictures. What to do? EASY, select Library > Current Library > Update Media Library. Smart Pix will scan your Source Folders, adding new files and removing those that no longer exist.
Lesson 4: Keyword Groups
Once you have mastered Smart Pix and have 10,000 of your favorite car pictures listed, each with 10 or so keywords, you might find that your keyword list is too long and finding the one you desire too hard. For this Smart Pix has optional Keyword Groups. Keyword Groups allow you to hide all keywords under convenient headings so you only need to display the items you are looking for.
Lesson 5: File Security
Naturally you may want to limit access to your files to other users. For this, Smart Pix offers password protection, which limits access to your media library to those people who know your password.
However this won't stop someone from browsing to your image folder and viewing the pictures with another application, so there are two image security options.
The easiest way to get underway with Smart Pix is to work through the items on the Getting Started dialog, just click Help > Getting Started.
Also: